Getting Started
Once you have OpenSight installed, you need to access your Raspberry Pi to view the interface. The way to accomplish this will vary based on your setup. If you are on a robot network, simply go to http://opensight.local/ in your browser.
Note
Currently there is no mechanism for static IPs, however this is a planned feature for the next minor update.
Nodetree Interface
The nodetree interface is the heart of OpenSight. Here you will see everything you need in order to create a working vision pipeline. Each draggable block is called a "node". Every node an instance of a certain "function", which defines what it does. For example, seen below is a node with the blur function.
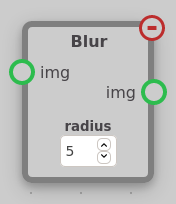
Each node has inputs and outputs. You can drag the output of any node into any input of the same type. Each input and output has a name which should give you a good idea what it can connect to. For example, the blur node above inputs any image and also outputs an image.
Many nodes have settings. These are options which affect what the function of a node actually does. For example, the radius setting in the blur node affects how strongly the input image should be blurred.
Node Menu
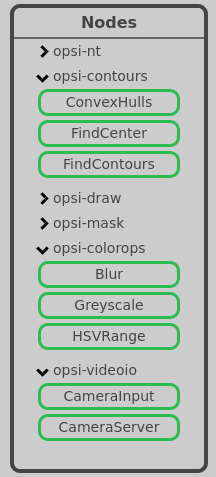
Different functions are broken up into different modules. Each module is displayed separately in the node menu. Similar nodes are grouped together in modules. For example, nodes pertaining to NetworkTables are kept in opsi-nt, and nodes pertaining to contours can be found in opsi-contours. You can click on a button to create a node of that name.
Status Indicator
The status indicator is at the bottom right of the nodetree interface. Here, you can see the status of your nodetree. If it has saved and started to run successfully, you will see a green checkmark. If there is an error, an X will be displayed. You can hover over this X to see the error. After modifying the nodetree, the status indicator will turn gray and then run a spinning animation while it is being saved and tested.


Settings
The settings menu is where the system configuration is located, as compared to node-level configuration.
Network Config
Static IP
Currently, this indicates whether your roboRIO network uses a static IP system (eg. access your roboRIO at 10.TE.AM.2). A proper static IP setting mechanism is planned for update v0.2.0.
Server Mode
If you aren't on a roboRIO network and want to access NetworkTables, you can enable "Server" mode. In Shuffleboard settings you can set the "Server" to the IP of your OpenSight instance (eg. opensight.local). If you are on a roboRIO network, this should always be "Client".
Note
Some options, such as system restart options and the updater are only available on the Raspberry Pi or other ARM systems.

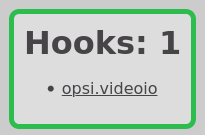
Viewing the Camera Stream
You can view the Camera Stream through a part in OpenSight known as a "Hook". Each module can have its own hook. A hook is webpage which allows a module or node to be viewable in some way. Camera Server uses a hook which allows you to view the stream of every camera server by clicking the opsi.videio hook. NetworkTables will also have its own hook soon.